Managing Conda Environments#
It’s extremely common in software engineering and data science to need different sets of packages (and potentially different versions of Python) for different projects. To make this easier, conda is capable of creating isolated “environments”, each with its own version of Python and related packages.
While it is not always necessary to use isolated environments, it becomes extremely useful for avoiding problems when working with more complicated Python libraries — like geospatial libraries (e.g., geopandas) or distributed computing tools (e.g., dask).
So let’s go over how to create and use conda environments.
Create a New Environment#
To create a new environment (here I’m creating one called dask_env), simply run the following code:
conda create -n dask_env
This will create a new, empty environment. If you want to get packages installed during environment setup, you can just list the packages you want (with versions if you want to specify them):
conda create -n dask_env python=3.11 dask
To use an environment, you first have to “activate” it. When you create the environment, conda will also give you directions about how to activate it. On a mac, this looks like:
#
# To activate this environment, use
#
#     $ conda activate dask_env
#
# To deactivate an active environment, use
#
#     $ conda deactivate
How to activate an environment, do you as conda instructs! If you’re using Oh-My-Zsh!, then you will also see your current environment reported from the command line:

(And now you know what that (base) that’s always been at the beginning of your commandline meant! It was telling you that you are in your base conda environment).
Once you run that activate command, anything you run from this terminal (including a session of jupyter if you launch it from this command line right now) will be running the Python installation in that environment.
Installing Packages After Setup#
Because this environment is isolated, none of the packages you had installed in your base environment are accessible anymore, so the first thing you need to do is install whatever packages you need. To install packages in an environment, you have to make sure it’s active in your current terminal session before using conda install or pip install.
Using Your Environment#
For a tool like Jupyter Notebooks or Jupyter Lab, just activate your conda environment then launch jupyter from that same session, and it will run against your environment.
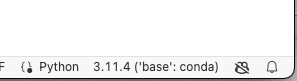
For a tool like VS Code, you have to specify the Python installation you want to use explicitly. For regular Python sessions, just click the Python interpreter icon in the bottom bar:
Then select the version of Python associated with the environment you just created:

(Obviously your list of environments will look different from mine)
And for Jupyter sessions in VS Code, click on the “Select Kernel” button and you should see an installation (if you installed Jupyter) associated with the environment you want:
Note that if you DONT see your geo environment, you may need to click the “refresh” wheel on the interpreter selector or quit and reload VS Code!